Tiramisù, arguably Italy’s most successful dessert export. Soft, velvety, delicately sweetened cream, offset by dark espresso soaked sponge, with a finishing hint of alcohol: a melt in the mouth, dessert lover’s masterpiece.
]]>
“Tireme su” – ‘pick me up’
Tiramisù, arguably Italy’s most successful dessert export. Soft, velvety, delicately sweetened cream, offset by dark espresso soaked sponge, with a finishing hint of alcohol: a melt in the mouth, dessert lover’s masterpiece.
Precursors, historical legends and fanciful tales claiming the dish’s invention abound. Legend has it that, in the 19th Century, this delectable treat was created by a Madame who ran an Italian brothel to serve as a ‘pick me up’, to reinvigorate their tired clients before they returned home!
More likely, ‘sbatudin’, a 19th Century creation from Treviso comprised of egg yolk beaten with sugar, contributed a key part toward the modern recipe, as did others found in Pellegrino Artusi’s (1891) famous recipe collection “Science in the Kitchen and the Art of Eating Well” - a book that forms the basis of modern Italian cuisine. One such example is ‘Dolce Torino’ (Turin Cake), in which ladyfingers soaked in Rosolio (a sweet Italian liquor) are layered with a whipped mixture of butter, sugar, egg yolks and chocolate in alternating bands and finished with roasted hazelnuts or pistachios.
The first dessert with the name ‘Tiramisù’ was created around 1950 in Friuli at the Il Vetturino restaurant, by chef Mario Cosolo, using cream instead of mascarpone, sponge cake instead of ladyfingers, and marsala wine not coffee for dipping the fingers. The classic recipe we know today is attributed to Chef Norma Pielli at Hotel Roma, in the Friuli town of Tolmezzo who modified the aforementioned recipe from Artusi.
Modern variations of the dish vary the dipping liquid (e.g. limoncello, brandy, fruit juices), the mascarpone (whipped cream, ricotta, yoghurt) and ladyfingers. Such has been the influence and love for this dish worldwide, that today it’s possible to compete in the annual Tiramisù World Cup, held in Treviso, which accepts entries for ‘Original Recipe’ or ‘Creative Recipe’ desserts (check out the full rules here). You can also challenge for the Guinness World Record for the largest tiramisù, currently standing at 3015kg (6,646lb).
I was in Rome earlier this year, and stumbled across this incredible little cafe, "Mr. 100 Tiramisù" (@mr.100tiramisu). It is beautiful inside, with an old brick arch, dark wood beams, and some of the friendliest staff I've ever come across creating a wonderful ambience.
Living up to its title, it serves 100 - I kid you not - different variations of tiramisù. I didn't have the brainpower to photograph the 'Classico' tiramisù I ordered as I was too excited to eat it, but here's a shot of the extensive menu:
If you have the opportunity, please check it out: the dessert was divine, and definitely a place I'll revisit next time I find myself in the city. In the meantime, one can celebrate World Tiramisù Day every March 21st – the first day of Spring, and in the words of the founders Clara and Gigi Padovani:
“There’s nothing better than tiramisù to celebrate the arrival of spring and to leave the grayness of winter behind.”
Couldn’t agree more. Suffice to say, it’s a dessert that has rather captured the world’s imagination, and for good reason. As mentioned, this has led to a plethora of recipe variations from which to choose, but with this post I decided to stick to tradition. What follows is a classic recipe, and the end result is simply sublime. Please note, this recipe does contain raw eggs, so if you’d like to avoid them skip to the bottom paragraph ‘how to pasteurise eggs’ to substitute.
Prep time: 40 min
Setting time: 4 hours
Serves: 6 to 8
Additional equipment required:
Food in my family has always been the centre of every gathering and for as long as I can remember, I have always been surrounded by it. There wasn't a celebration or a visit from a long distant cousin that wouldn't call for a feast. But this is not different from the reality of most Italian families, those who will sit at the table on a Sunday and will start from an aperitivo to an endless array of delicious creations by nonnas. Growing up in a little village in Cilento, Southern Italy, and spending most of my summer holidays with my grandparents at their farm allowed me to taste different ingredients, food and come closer to understanding them.
I remember helping my nonna with Bianchina, a gorgeous goat that would make the most delicious milk, and watching how from the very same milk, 'caso' - dialect word for 'cheese' - would be made.
We would prepare our passata, a yearly ritual that would involve extended family members, or I have fond memories of nonna making fusilli and again three generations of women preparing pickled vegetables. But the things that I enjoyed the most was collecting all the fresh eggs our lovely hens would have for us, or getting up at dawn to follow my grandpa in my wellies to his vineyard, conveniently positioned downhill.
In this article, I will be sharing a little history and a recipe for ‘Fusilli Cilentani’.
I can't imagine any little girl or little boy in Italy not having seen their nonnas or mammas making fresh pasta. Like many, I remember my nonna's hands signed by time and hard work, but always ready to 'impastare' - knead the next batch of fresh pasta. Classic fusilli would be on the menu, rigorously served with beef ragout. But also, cavatelli or ravioli with the famous passata prepared the year prior. The little kitchen overlooking the courtyard of the palace, where my grandparents used to live, had one of those larders whose doors were made out of linen folded over a cord, the Majolica worktop of a blue cobalt colour and the trustworthy wooden 'lanaturo' was there ready to work their magic. I can see it now as if it were yesterday, the palace that is. The huge bedrooms, the outdoor corridor glowing with plants, fuchsias were nonna's favourite. But this is another story.
Going back to pasta, nonna used to simply use water and semolina rimacinata, which means re-milled, from durum wheat. The dough was then left to rest before shaping. To roll, a wooden broom's stick would be used, and to shape, anything from the back of a fork to a 'ferretto' made out of an umbrella metal stretcher. There wasn’t a precise recipe for the pasta dough, it was all about adding water and flour until the perfect consistency was achieved.
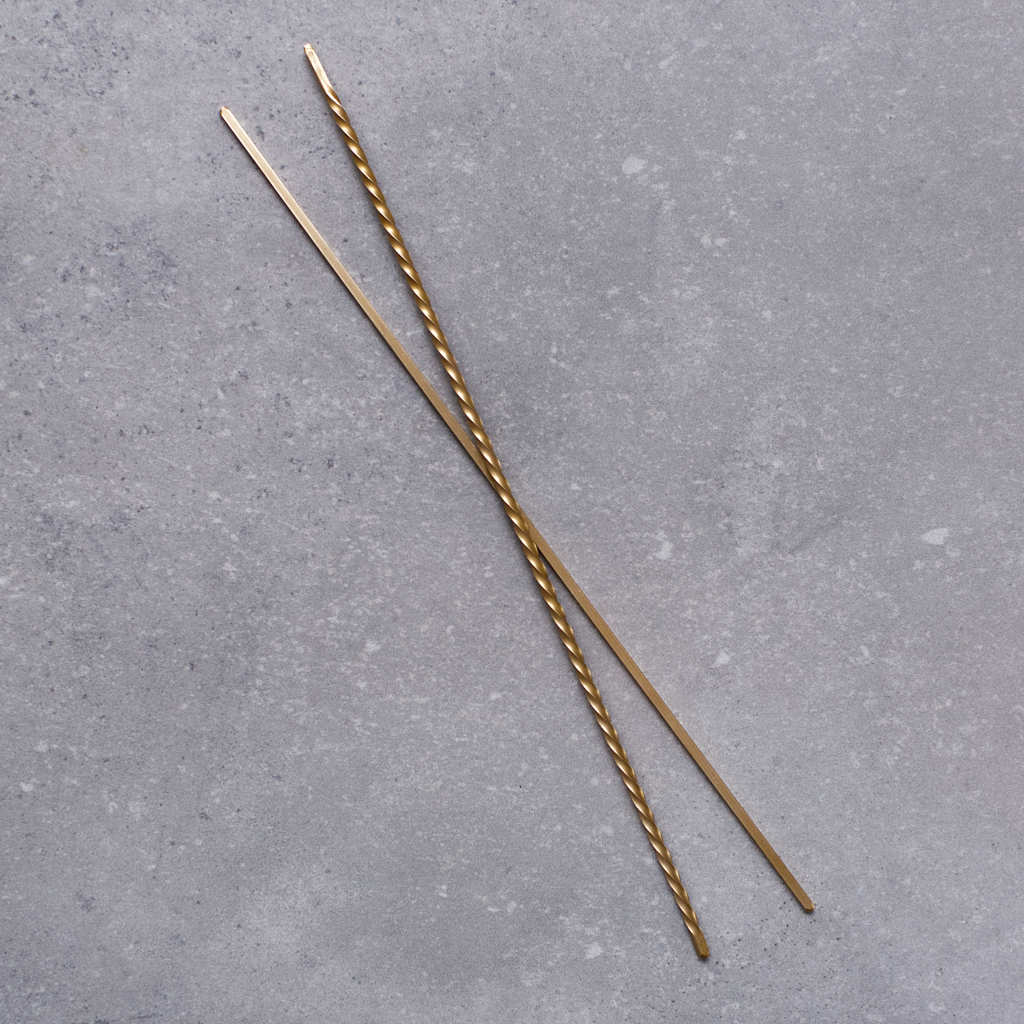
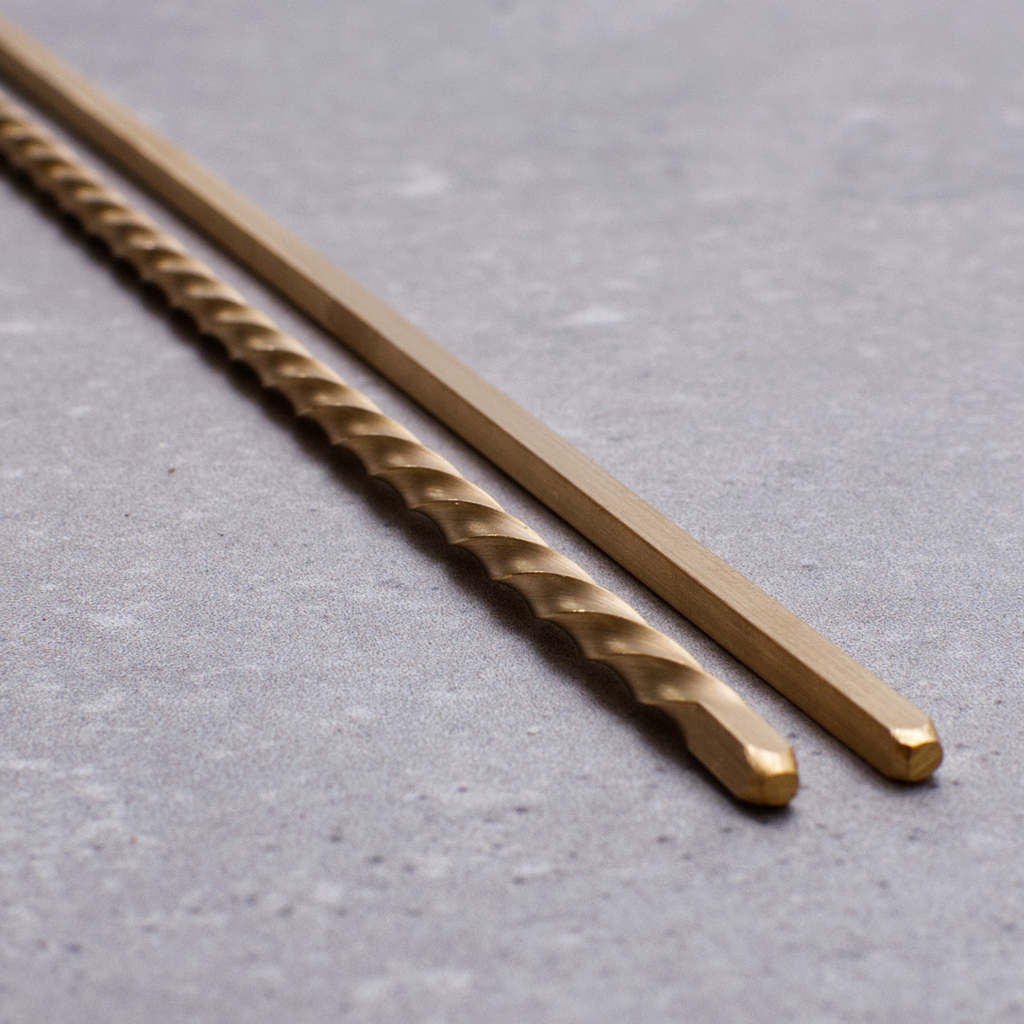
Depending on where you visit in Cilento, the origins of fusilli may vary as well as the ingredients. The common denominator is the cucina povera, or poor cuisine, and the pasta was made from whatever ingredients were available at the time. Fusilli are a long and caved pasta shape prepared using a ferretto and is part of the PAT - Prodotto Agroalimentare Tradizionale - an Italian body that regulates and protects the typical products of local agri-food tradition. There is also a dedicated ‘sagra’, a gastronomic feast, to further celebrate the meaning of this pasta.
According to history, in a place called Felitto, this shape was created in the 16th century following 10 days of siege from the Saracens, after a request from their Commander. In Gioi, another village on the Cilento hills, it is said that fusilli were created back in the year 1000. The inhabitants, also surrounded by the Saracens, started showing them the pasta dough, made from flour and eggs, by placing it on their weapons through holes in the boundary walls. When the invaders then pulled their weapons, the pasta dough would taper around it, from which is believed the traditional name ‘fusiddu’ (spindle) came from.
Fast forward some centuries, the ferretto used today is different in size, but still the same in shape, having 4 ‘faces’ as we say, or sides to it, giving the characteristic squared shape. Before those used by my nonna, it is believed that old horseshoes were recycled and shaped into ferretti.
And now to the recipe. I have only used semolina rimacinata and water, but for a more enriched dough, you could also substitute part with eggs. I then accompanied with a simple ragout in keeping with all the principals of the simple cucina povera.
For the pasta dough:
For the sauce:
Start by making your pasta dough, by hand or using a stand mixer. Place the flour in a bowl and create the famous well. Start pouring the water, mostly all, and start mixing until you create a dough of a malleable, but not too soft consistency. Place the dough on a surface and start kneading for about 10 minutes, until the dough becomes smooth. Rest the dough for about 20 minutes.
Whilst the pasta is resting, prepare your sauce. Heat your saucepan and place in the olive oil and the chopped onion. Wait until this is translucent and then add your beef. Give time to the beef to brown slightly all around and add all your passata. Once the sauce has boiled once, lower your heat and cook for about 2 hours, until the sugo is reduced and the meat is very tender.
Time to shape your fusilli. Now that the dough is well rested and the gluten has formed, it’s time to make the iconic fusilli shape. From the dough, cut smaller pieces and start rolling these into long strings of about 1 cm round - you can have your little finger as a guide for the width.
From each rope, cut smaller pieces of about 5 cm in length. Place your ferretto on top and by applying a gentle pressure, start rolling using the whole length of your hand. As you roll, you should elongate the pasta dough, to long caved strips of about 15cm-18cm in length. Continue until you finish the whole pasta dough.
To finish your dish, cook the pasta in salted water for about 5 minutes, until al dente and serve topped with the sauce and pieces of ragout. Oh, and there is never enough cheese to accompany this dish. Hard sheep cheese is great and will accompany the sweetness of the passata beautifully.
Buona Appettito!
Sofia Gallo is a Masterchef quarterfinalist, chef, cooking instructor and brand ambassador for several top cookery brands. Originally from Cilento in Southern Italy, she now enjoys living in Buckinghamshire with her family. Her love for Italian food goes back to learning how to make fresh pasta on her nonna's knee, and today she enjoys sharing and demonstrating beautiful regional Italian dishes. You can find more examples of her recipes and instructional videos at lamiacucina.co.uk and on her Instagram and Facebook accounts.
]]>
My journey learning about Italian food continues. It invariably started with the eating, but has now progressed full-flow into cooking. I’ve never tried making ravioli before, and delving into my subconscious, perhaps it is because I was a little intimidated to.
There are so many perfect looking examples of filled pasta you can purchase from your local supermarket or specialty food shop, with exotic sounding fillings, whose creation seems beyond the reach of a home cook. The technical aspect of creating (in essence) a pasta dumpling, with just the right amount of not-too-wet-or-dry filling, that doesn’t burst whilst cooking, and is delicious enough to justify the work involved, are all points my internal antagonist has been whispering to stop me thus far attempt this classic pasta.
Well. I’m pleased to report that I attempted ravioli making, and I’m as surprised as anyone when I say it was surprisingly simple… and delicious! Many food blogs (some of which I follow avidly) are guilty of making similar claims of simplicity, no matter what the recipe. Yes, ‘ease’ is relative, and dependent on prior skill and experience. But as I am happy to admit, I have little of either. And if I can do it – so can you.
I did stick to a basic classic recipe for the filling – but simple is often the best. As in so many examples of the finest tasting Italian food, the fewer ingredients, the more stunning the dish. I am fond of crab, so for no better reason, I made crab and ricotta ravioli. This classic recipe is as follows (feeds 2-3):
Ingredients:
Ravioli filling:
White crab meat 100g
Brown Crab meat 100g (I used fresh prepared crab meat which worked well).
Ricotta 50g
Lemon juice 1tbsp
Pinch of salt
Fresh Egg Pasta dough:
200g flour (00 ‘extra fine’ if you have it; plain if not)
2 eggs
½ tbsp olive oil
Pinch of salt
If you’re not a fan of the stronger crab flavour, change the crab mix to 150g white meat and 50g brown meat – or just use white meat.
Method:
Pasta dough:
My inner child still gleans satisfaction from piling a mountain of flour on a board, forming a volcanic crater, and cracking eggs straight into the middle. Rebels (and pasta aficionados) don’t need mixing bowls.
Mix the eggs with a fork, and gradually combine in the flour to make a dough. Knead for about 10 minutes until the dough is smooth, stretchy and springs back to the touch. Add a little water (a tablespoon at a time) if too dry, or extra flour if wet and sticky. Cover and leave to rest for 30 mins to allow the dough to relax.
Ravioli filling:
Combine ‘ravioli filling’ ingredients in a bowl and stir. Your filling is ready! Cover and refrigerate until required.
Assembly:
Split dough into 4 balls, and roll out either with a pasta machine or a rolling pin. Given that a) I was using a relatively shallow ravioli mould (meaning less filling) and b) delicate tasting ingredients, I rolled the pasta thinly to achieve a good pasta to filling ratio.
Trim two sheets to cover the ravioli tray, with a little excess around the sides. Lay one over the tray and create divots in the pasta sheet for your filling to nestle into.
Depending on your ravioli shape, you can use various implements to do this (end of a rolling pin, back of a teaspoon etc.) but as I was using a more unusual triangular shape, I ended up using a finger.
Next - the filling. Piping is probably the most professional way, but I just used two teaspoons to scoop and transfer. I found that size-wise, rough spheres of filling whose top is slightly higher than the top of the ravioli tray worked well.
As I alluded to earlier, ravioli that don't seal and burst apart once cooking is one of my horror scenarios. A quick Google search suggested tracing a bead of water along all pasta edges to be sealed with a finger, which I did. Cover with the second sheet.
Time for the fun part. I thought there would be some nifty trick here, but no. Just carefully over the tray slowly with some downward pressure, and the ravioli are sealed and cut in one motion. My nightmare of torn, burst, badly sealed ravioli never materialised. It was, on an otherwise uneventful day, quite a revelation. I’d just made ravioli.
Knock out onto a floured board. Some needed teasing apart by hand, but it was easy to do.
Cook immediately, or freeze (just place a single layer of ravioli in a freezer bag and lay flat in the freezer). I tried both methods, and for experiment’s sake, having cooked both for comparison - I honestly couldn’t tell the difference. Of course, the only meaningful caveat is to cook the frozen pasta a minute or two longer.
Below I've shown a cross section through a cooked raviolo. The filling spread quite evenly throughout, and cooked without any drama or splitting.
Classically served with a reduced white wine, butter and lemon sauce. Lacking two of those three ingredients, I melted butter with fresh chopped chives and tossed the cooked ravioli in the pan before eating immediately. I enjoyed it immensely, and more profoundly, feel like I’ve added a new string to my culinary bow. Onward!
]]>
To be honest, I had initially written off gnocchi as hard, dense and tasteless, such was my repeated experience with supermarket offerings. Fresh homemade gnocchi is a different thing entirely – beautifully light and delicate, and sublime paired with a classic tomato sauce, or simply pan fried in butter and seasoned with pepper, parmesan and basil.
These little dumplings, often ridged, are commonly made from potato, semolina, flour, or cheese and are incredibly versatile. My first experience of fresh potato gnocchi was ‘Al forno’ – finished in the oven with sage butter and parmesan. Incredible. I have been a convert since, so if you’ve never tried fresh gnocchi before, I want you to share my joy!
The gnocchi my wife and I have made previously has been with freshly boiled potatoes, left to dry and cool before adding flour to make the dumplings. However, given the large quantity of leftover mashed potato in our fridge, I thought I’d attempt to turn this rather bland leftover ingredient into one of my favourite dishes. Read on to find out how it went!
Ingredients:
800g mashed potatoes
1 egg
200 grams ‘00’ flour (or plain flour)
Salt and pepper to taste
Notes:
If cooking from fresh, use 800g boiled potatoes and leave for 10-15 mins to air dry to allow surface water to evaporate (this in turn reduces the amount of flour required to obtain a workable dough). Alternatively, boil the potatoes whole, with skin on, and peel and mash/rice once cooked.
The egg can be omitted – just remember to reduce the amount of flour accordingly as you’ll be starting with less liquid in the potato mix. The gnocchi will turn out a little lighter and with less ‘bite’ without the egg, but the dough may be a bit trickier to work.
Flour – ‘00’ you have it, but plain flour works perfectly well.
Method:
Add the potatoes, half the flour, and egg to a bowl and mix with a wooden spoon.
Tip out onto a floured pastry board or surface, and gradually work in the rest of the flour.
Knead as little as possible to prevent the dough becoming claggy. Aim for a smooth, soft dough that isn’t too sticky.
I find that with this quantity, it’s easiest to divide the dough into 8 (roughly) equal balls.
Dust your board lightly with flour, roll one ball into a finger-width sausage and cut into squares all the way along. For reference, mine in the pictures were about 1.5cm square – but this isn’t a science so variations are welcome!
it’s not a requirement, but adding ridges to your gnocchi a) increases their surface area to trap delicious sauce in, and b) looks pretty! If you don’t have the time, skip straight to the cooking stage. And so, onward to the meditative mindfulness that is gnocchi rolling. Using your thumb, gently push and roll the gnocchi down your gnocchi board or back of a fork to get the classic shape:
Place on a drying rack, or floured tray or plate. Repeat until your dough is all used up.
Cooking:
Bring a large pot of salted boiling water up to the boil, and cook in batches. Cooking time recommendations vary, but I find that waiting for the gnocchi to rise to the top, then adding another minute works well. Drain, and they’re ready for the finale.
Top with a sauce of your choice, fry with butter and herbs, or oven bake once sprinkled with cheese.
Cooked gnocchi will keep in the fridge for a day. If you refrigerate gnocchi before cooking, you might find it turns brown overnight, rather like a cut apple. So best to cook before storing.
These were simply pan fried in browned butter, and topped with pepper, freshly grated parmesan and basil. I won’t lie… it tasted delicious. Comparing it with gnocchi made with fresh potato rather than leftover mash, I would say that it had a little more ‘bite’ than the original, but otherwise remained super tasty. And makes a dinner so much more appetising than a despondent mound of microwaved mash potato!
So a big endorsement from me, and definitely a recipe I’ll repeat in the future. Let us know your own experiences or comments below!